So the last two weeks have been pretty much dedicated to making boxes and constructing wicking beds. My mother (whilst helping me construct one of the beds) observed that I’m easily excited and I’ve gotta say that the concept, or the potential of these beds has been exciting. It’s also been kinda cool that word has obviously spread to the point when a neighbour popped in to tell me there was a pallet in a skip bin just down the road and then helped me extract it. It is probably time that I toned back my pallet searching though since it’s beginning to feel like every time I leave the house is just another excuse to scope out the next treasure trove of free wood.
At this point I’ve made up a large box (the tank), a smaller box which I am in the process of decorating since this is going to go on the nature strip and also remade a ½ wine barrel. The process for changing box into bed seems so straightforward.
Line the box with plastic and put it where you want it to live.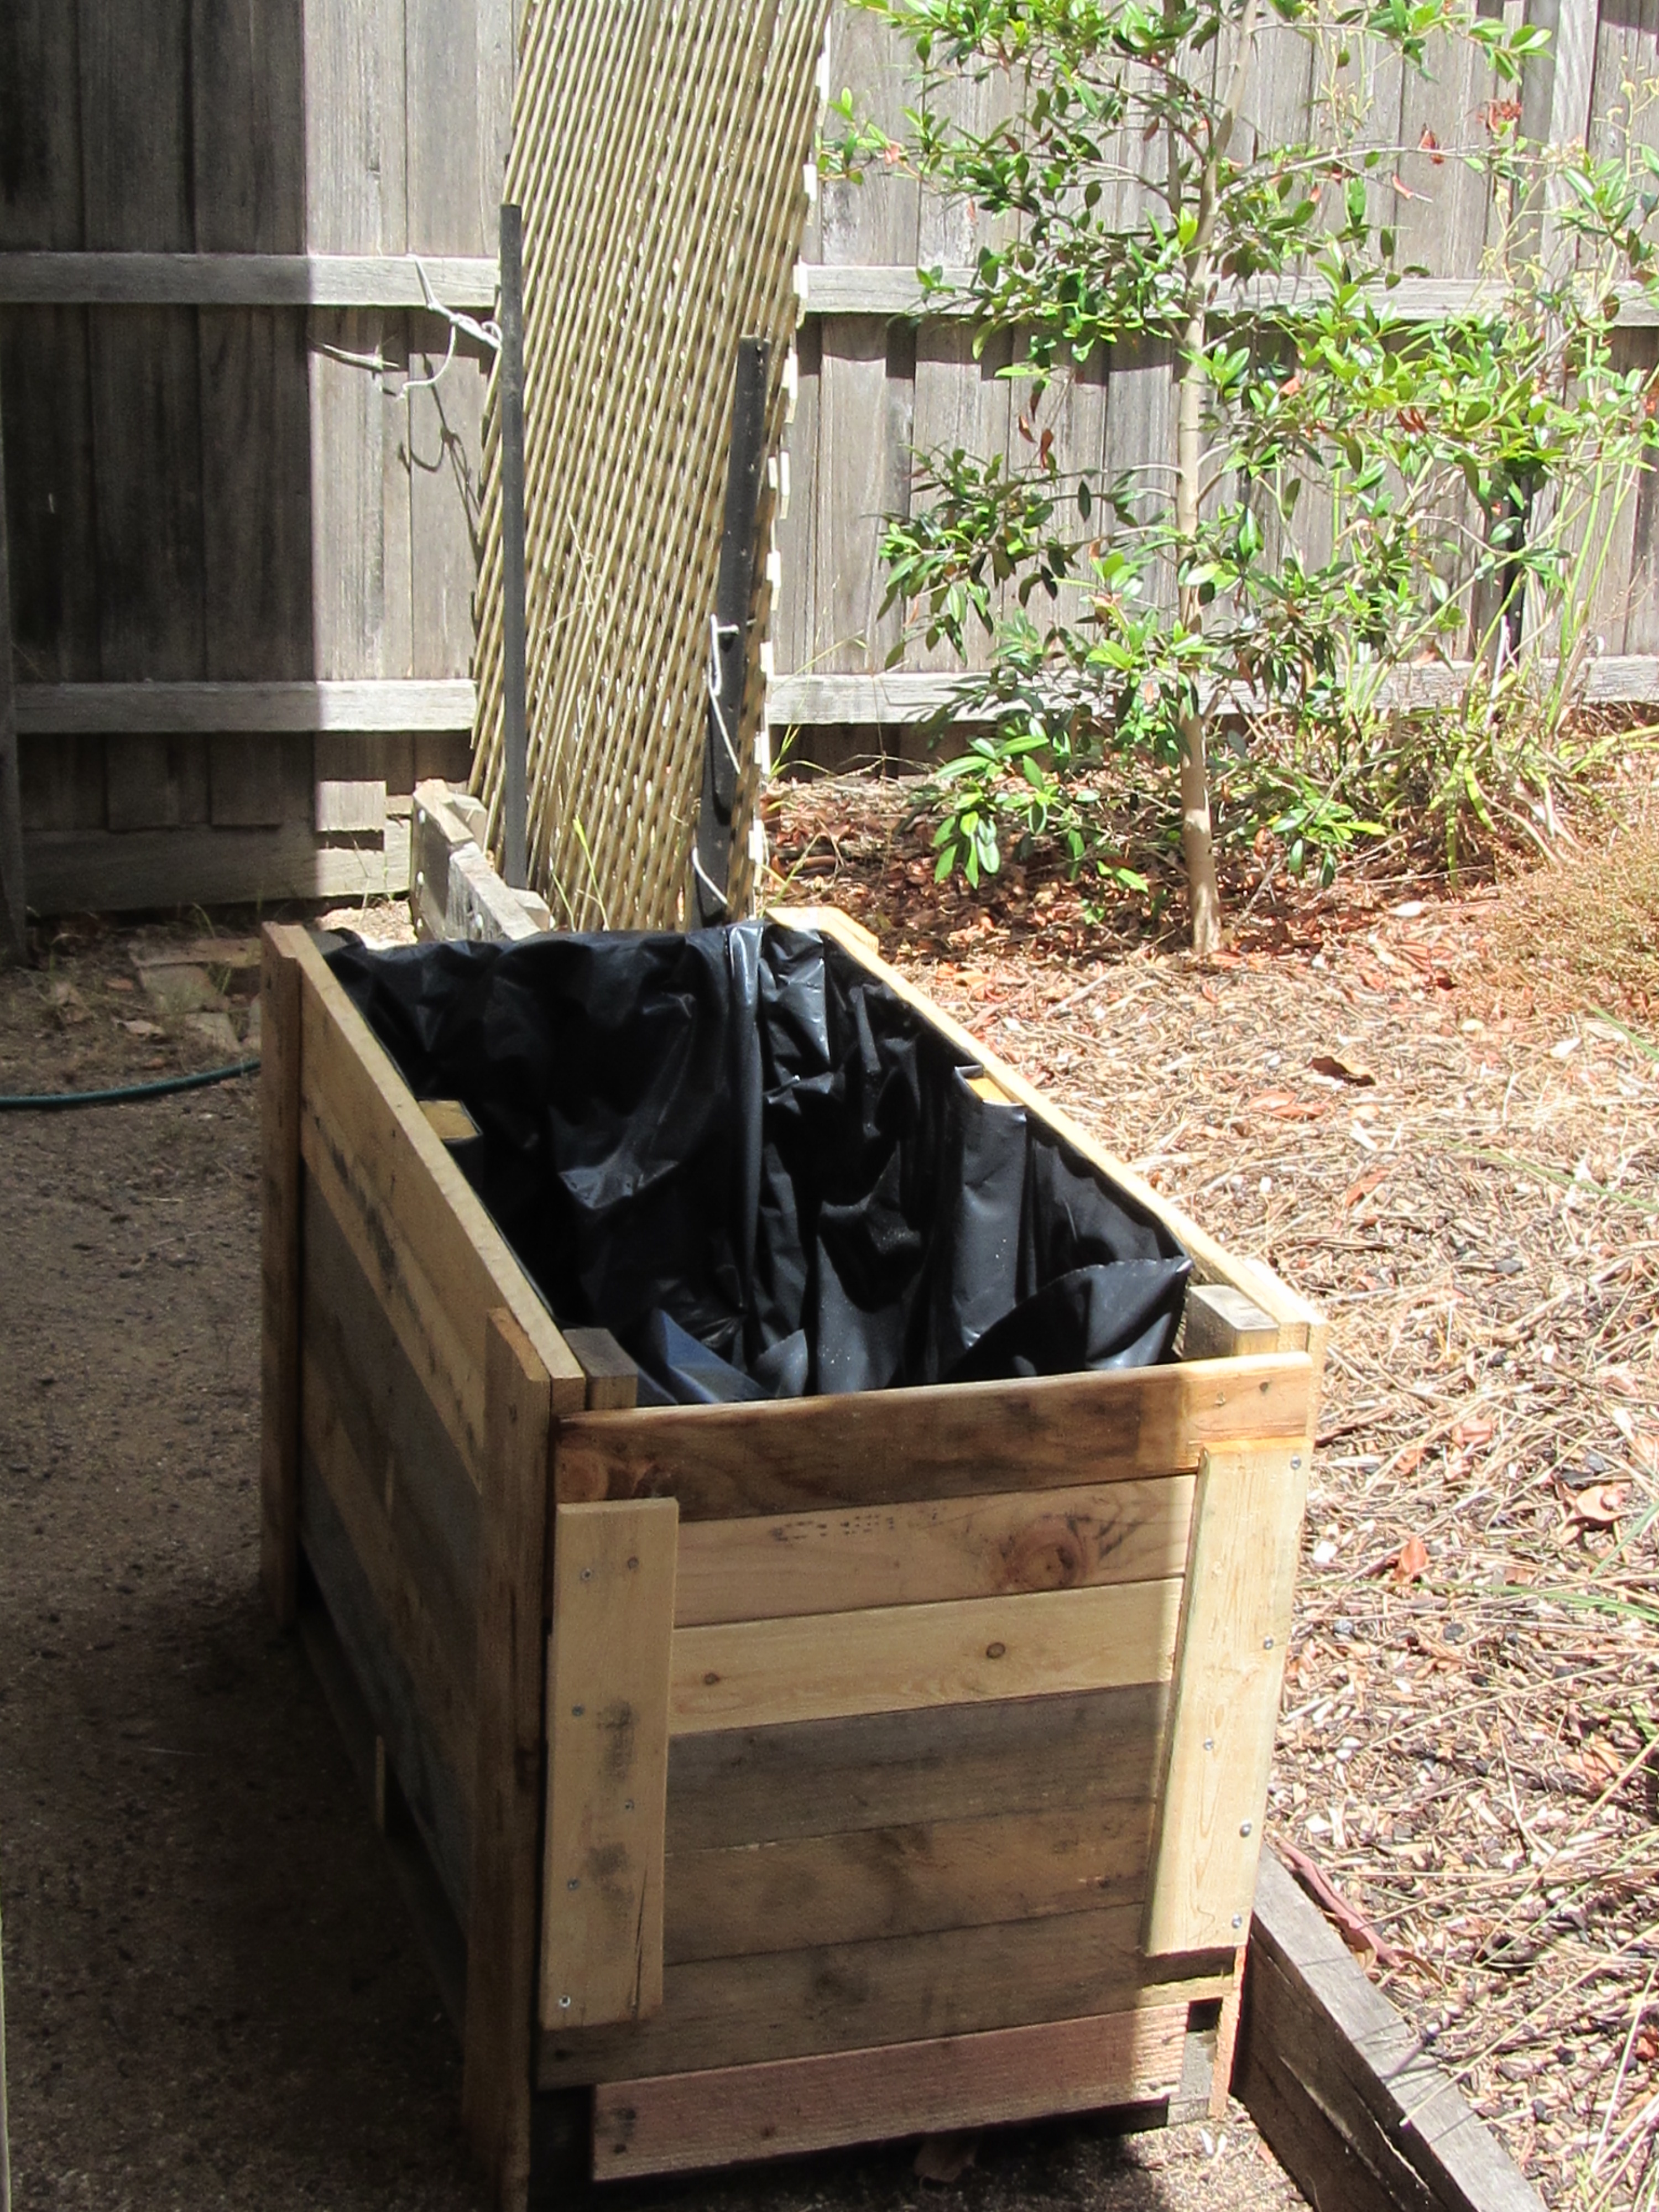 Place an agg pipe along the bottom of the plastic to allow the water to flow. Some people seem to recommend looping it around, I’m not sure it would make that much difference but I’m far from an authority. I’ve put a layer of weed matting over the top but again I think this is optional. The stick at the end was my way of keeping track of depth though I realised that the drainage hole that needs to be just under the top of the scoria (or whatever reservoir material you’re using) will do the same thing.
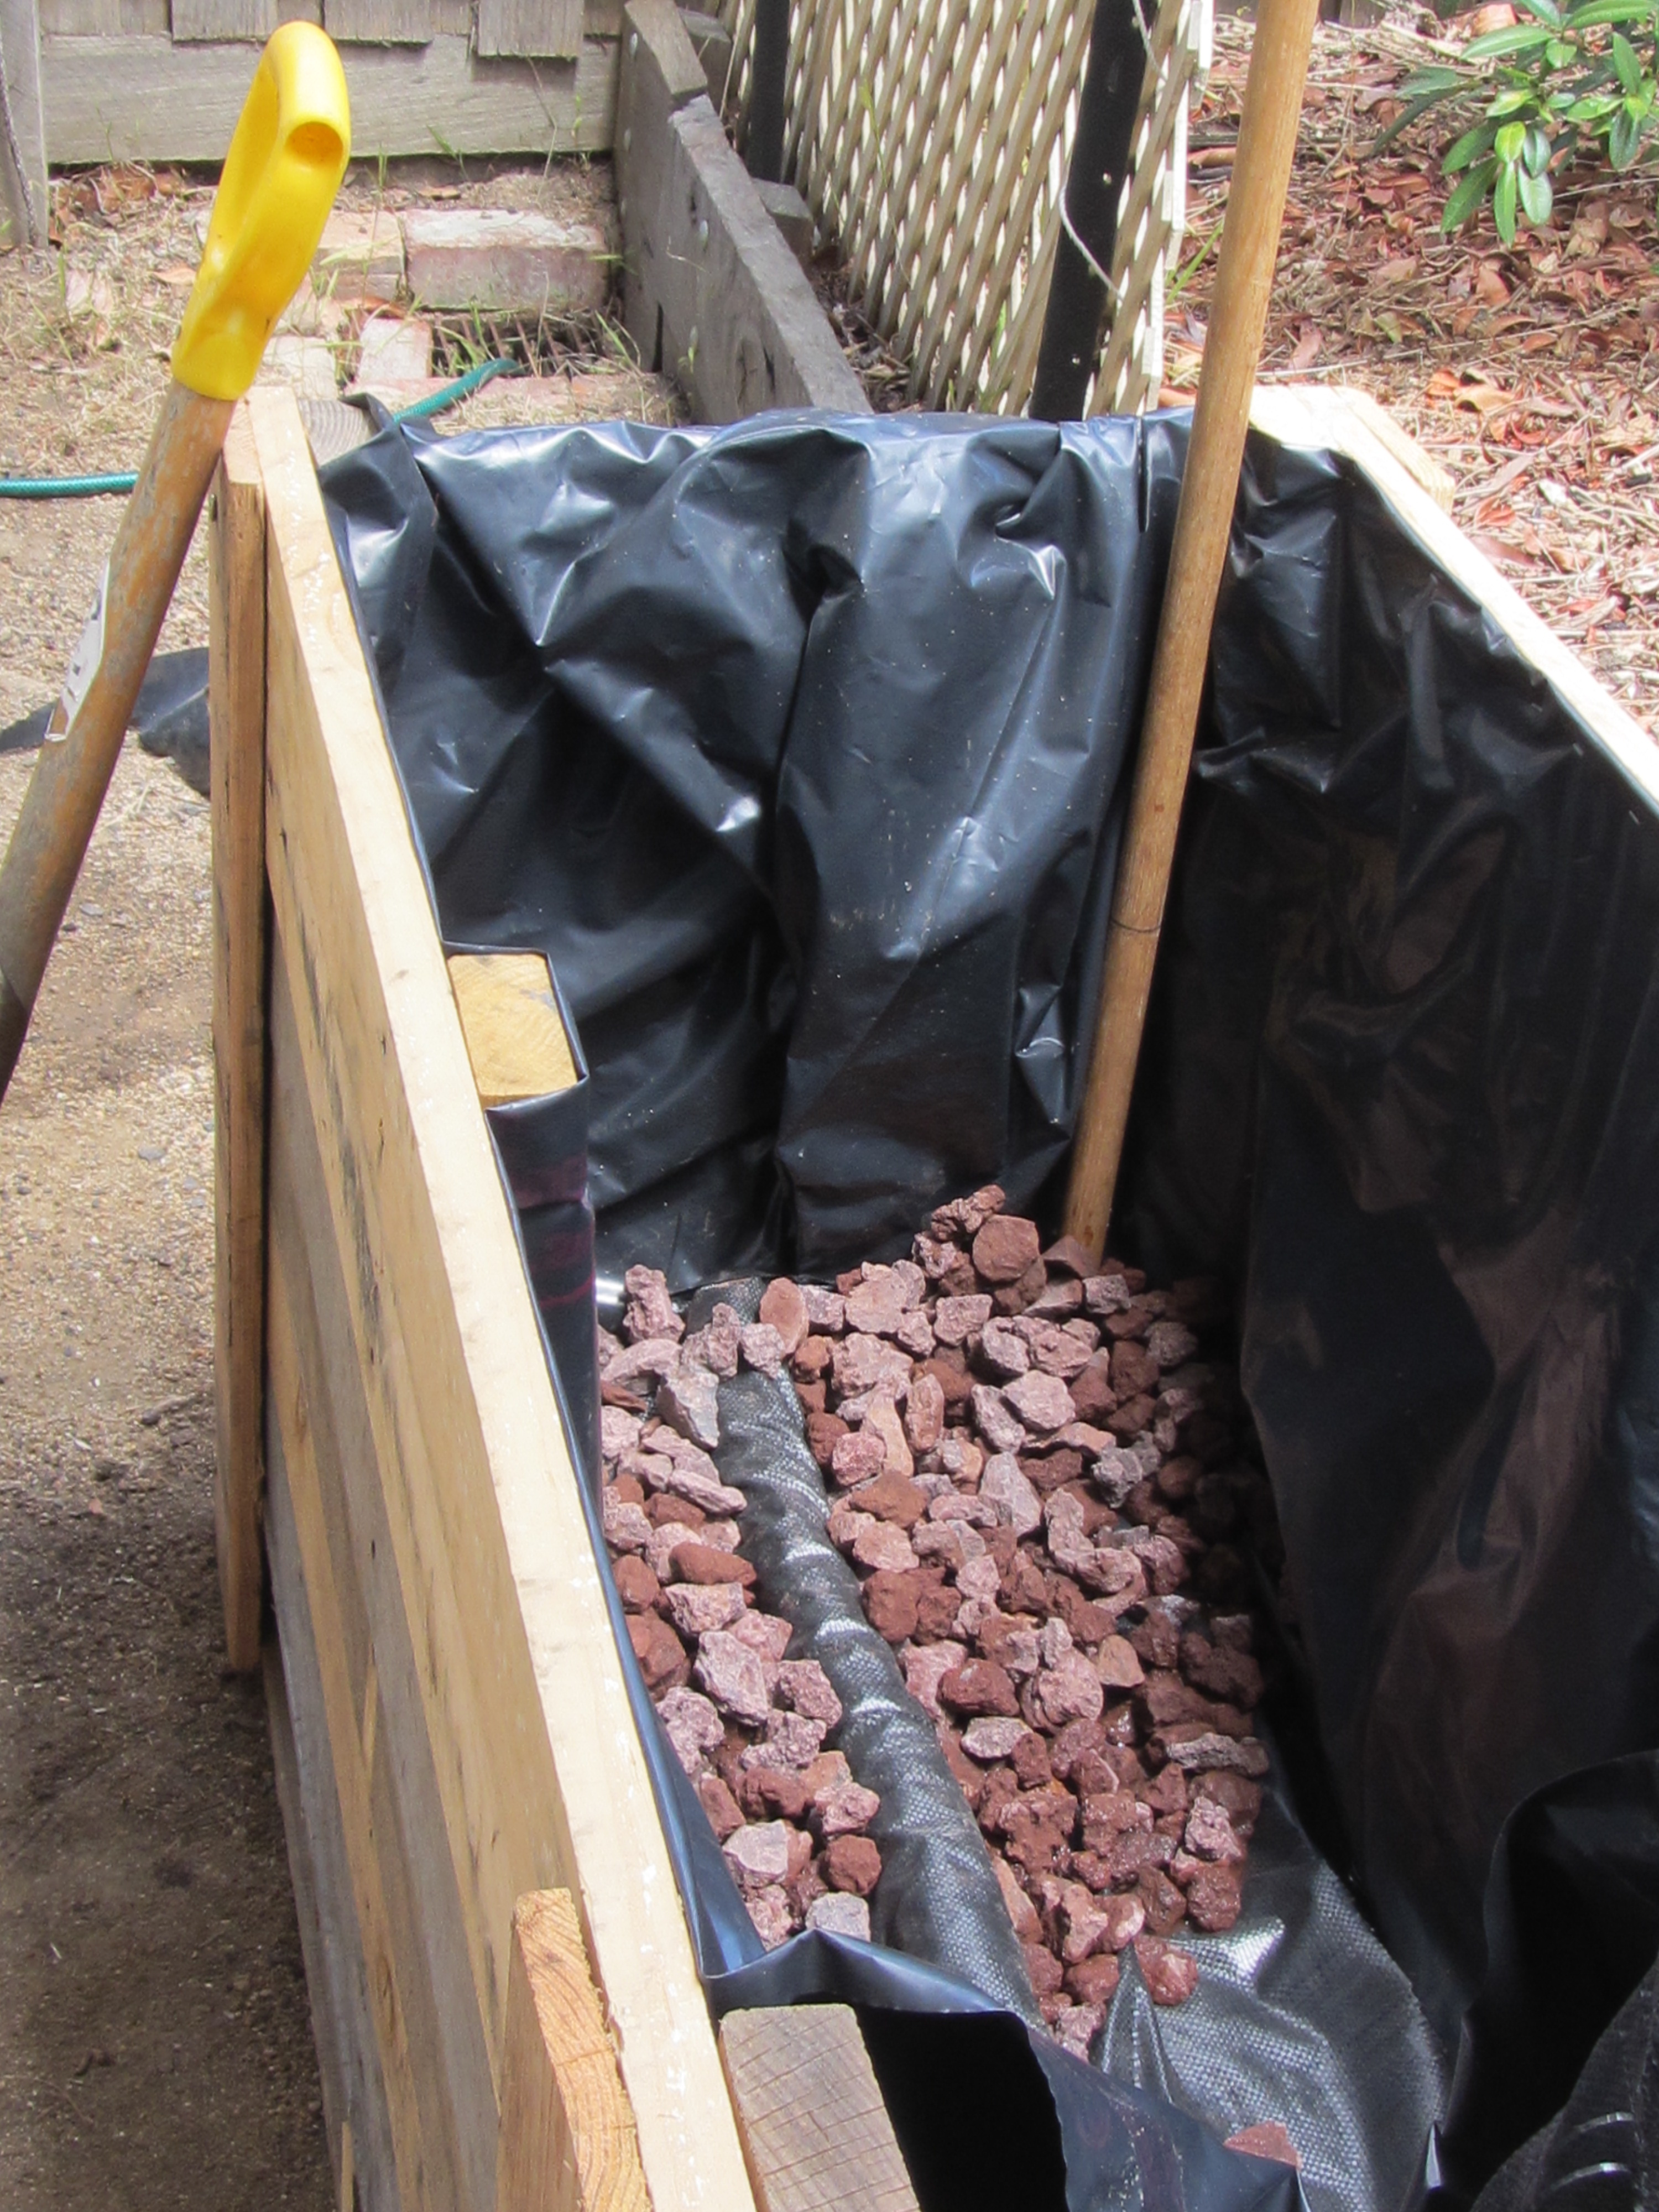
Fill the scoria to the line.
 Put a barrier layer that will allow the movement of water up but restrict the roots of the plants above from getting into the reservoir and also keep the soil out of the scoria. I’m using shade cloth doubled over but I’ve heard of people using a layer of cane mulch for the same thing.
Fill the rest of the space with soil (actually I’m using ½ mushroom compost and ½ mixed manure) and then plant your stuff out.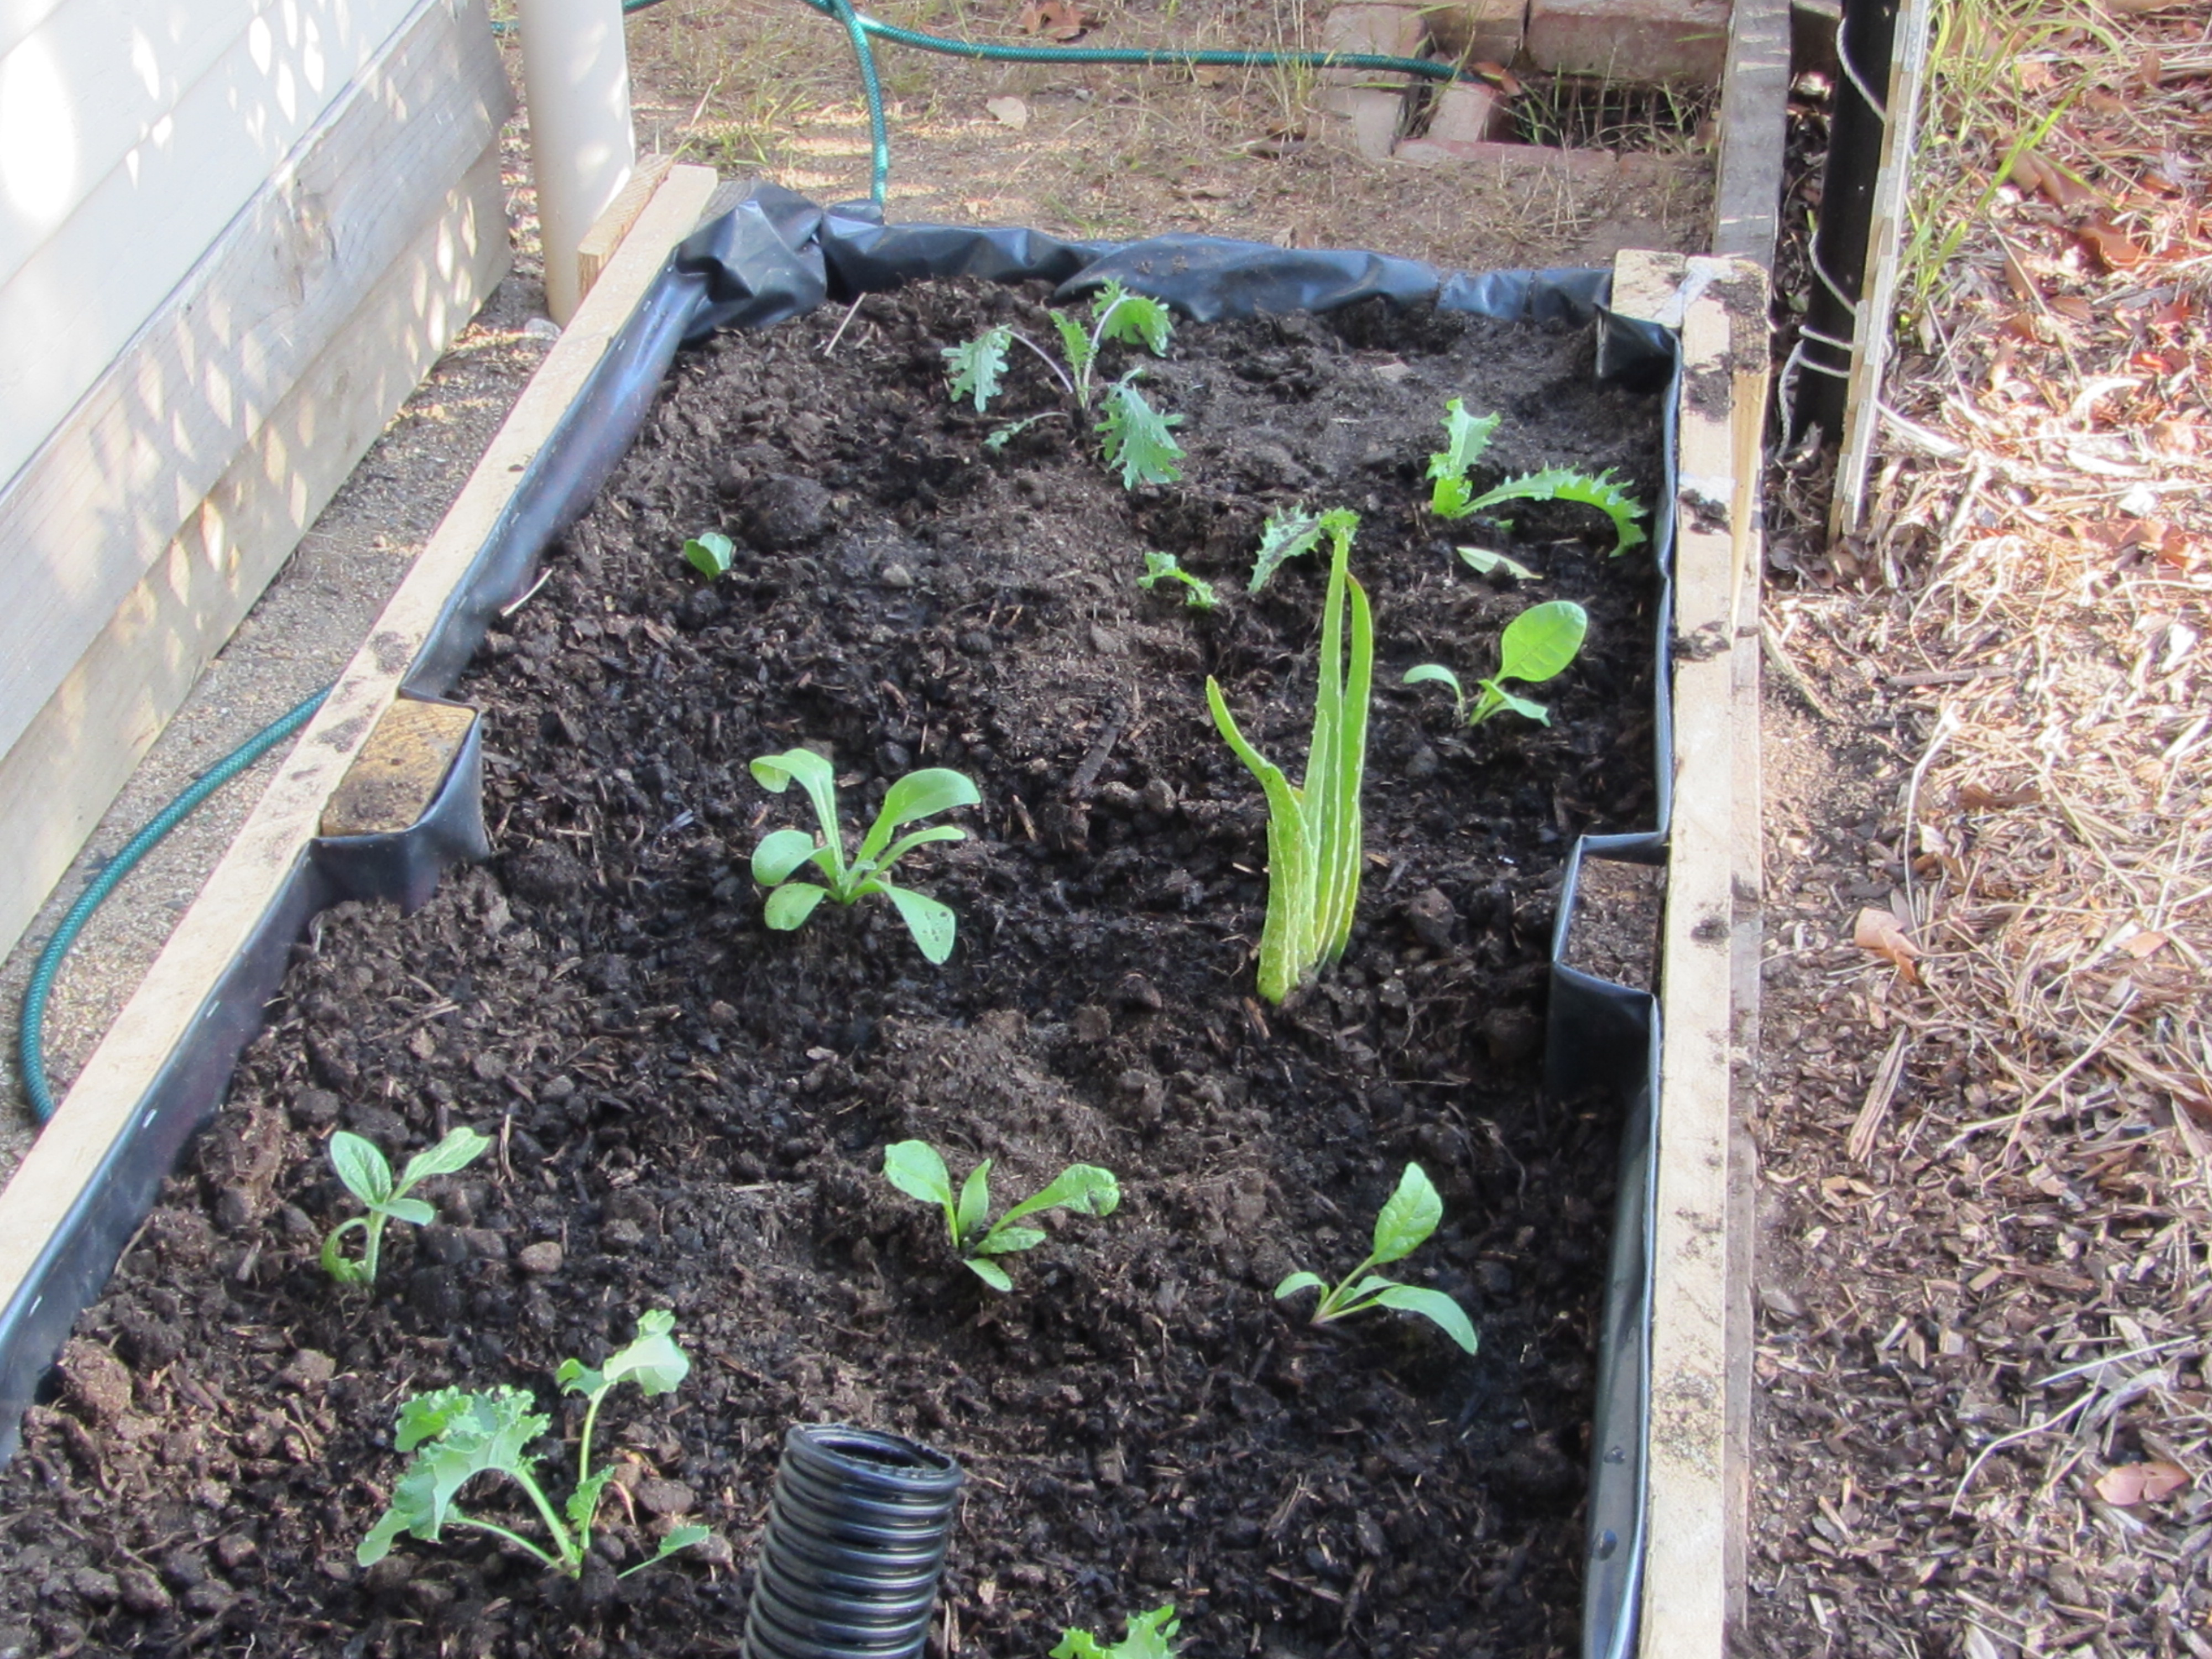
Sound simple huh! One of the criticisms of social media and blogs like this one is that you only ever hear when good things are happening or good events are occurring. It can easily give you the perception that everything is easy and that everyone else’s life is more exciting and successful than it really is. This can really suck if you try something new, let’s say like building a wicking bed and it doesn’t go the way its supposed to. Well let me assure you that this is not one of those blogs!
But back to the story; at the completion of the tank I was thinking everything was going brilliantly and so moved onto the ½ wine barrel. This is a smaller space so it comes together really quickly despite the fact that I’ve run out of the proper plastic and so used some plastic that I had in the garage. It gets finished, I split the aloe-vera and lemongrass and so everything is looking fantastic and I am standing back all gardening god like; there’s nothing I can’t do! Then it all goes wrong.!
Confidently I put the hose into the filling tube and switch it on. Now I’m not actually much of an expert at these things but I’m pretty sure the whole idea of lining these boxes in plastic was so that the water stayed on the inside. If this is the case why is the half wine barrel dripping at a fairly determined rate and the box more a waterfall than a pond? If I’m easily excited, I guess the flipside is that all that excitement can come crashing down pretty quick. So after a little bit of grumpiness, a night of drinking (thanks boss) and some fairly hard-core reframing (“this is an experiment after all!”) I set about disassembling the boxes, fault finding (which involved me at one point standing under the plastic lining ‘tent style’ trying to find holes and then plugging them with gaffa tape) and then finally reconstructing them. So some words of wisdom:
- be careful with your hospital corners when you try and fit a flat sheet of plastic to a 3 dimensional rectangular box. It turns out if you don’t have all the sides stapled up then things are bound to get damp (no matter how pretty it looks!).
- Use 200um plastic. Thinner plastic wont handle the weight of the contents (at least not until it’s basically 50% plastic and 50% gaffa tape!).
So whilst it’s been an up and down sort of weekend I’m really buzzed (yeh again!) to say that we now have two great looking containers (that don’t leak) and have begun planting them out. It was also great to be doing all of the work out the front of the house as this lead to all manner of random conversations with passers-by. The bigger box is in plain sight of the street and has been planted of with a mixture of vegetables and flowers so that it is sure to garner even more interest from the neighbourhood. The whole concept is once again exciting and now that the construction has got close to 1 box for 1 pallet I can really see that possibilities of 10 or so boxes lining the side of the street. I love the idea that if this all comes off a walk down our street for neighbours or passer-by could be both an inspiration about using open space to re-engage with nature, a lesson on what real food looks like and also an opportunity to link, communicate and build community especially if it’s done and owned by the street itself. I think a couple of weekends of cursing at random pallet wood and holey plastic is probably worth that.

Great job! Always exciting to make new from old, particularly when it results in vegie-growing :-). I used to be part of a community garden that was almost totally made of pallet boxes and wicking beds because of soil contamination fears (http://cliftonhillcommunitygarden.blogspot.com.au) – one thing to note: different pallets are treated differently, it’s worth learning what the wood treatment symbols on them mean, because some are treated with arsenic, whereas others are just heat treated. I know you’re lining them, but it’s a horrible thought to think of arsenic leaching into soil. Good luck with all the growing, and enjoy the conversations with neighbours that front yard gardening will continue to bring.
Hi Jen,
Thanks for the response. When I was planning this I talked to someone for the Urban Bush Carpenters (http://www.urbanbushcarpenters.org). There is a standard marking protocol for pallets (ISPM 15) that means that all pallets should be marked either HT for heat treatment or MB for methyl bromoide treatment. The advice is that you use either pallets marked HT or those without marking (which I guess are untreated). That said you don’t really know what the pallet has been used for so I think tending towards caution is a good idea. As such I’m going to line all of the boxes whether they are wicking boxes or not. If I were so inclined to do some law stretching and put them in public placed then I would plan to paint them as well (just to be sure). I also think that painting them could promote local ownership, publicise messages about greener living or maybe just create some small blackboards so that kids can draw or write messages as they sample whatever is growing.
Wow you put a lot of work into that! My mother made a couple using half-barrels for planting strawberries. Would have been a lot cheaper if she’d just bought some planter garden boxes (like from http://www.bloommaster.com/store/categories.php?category=Planter-Boxes) because the weeds appeared faster than the strawberries did! All that work just for more work. That’s Virginia for you, though. The weeds have gone airborne!!
Yeh but the effort is part of it. Not only does it mean that I can fault find when it does (or did) go wrong but perhaps more importantly I develop the skills and understanding about how to make these things work. This is an important step toward being resilient as the knowledge can then be apply to whatever is needed. I can only buy what someone chooses to make.
That’s an interesting comment about the weeds though since part of the point of wicking beds is to only water deeper roots and hence discourage weeds from growing……. or was it a standard bed?